In this tutorial, you are going to see an introduction to Stripe payment gateway and the plugin which we are going to use in our E-Commerce WordPress website.

Intro to Stripe Payment Gateway
Stripe is one of the best alternative payment gateway to PayPal. You can accept payments via credit card or debit card from your customers. The amount, which you receive from your customers, will be sent back to your bank account.
But the difference between Stripe and PayPal gateway is that the time taken for the bank transfer will be a little longer compared to PayPal and the pricing is a little different.
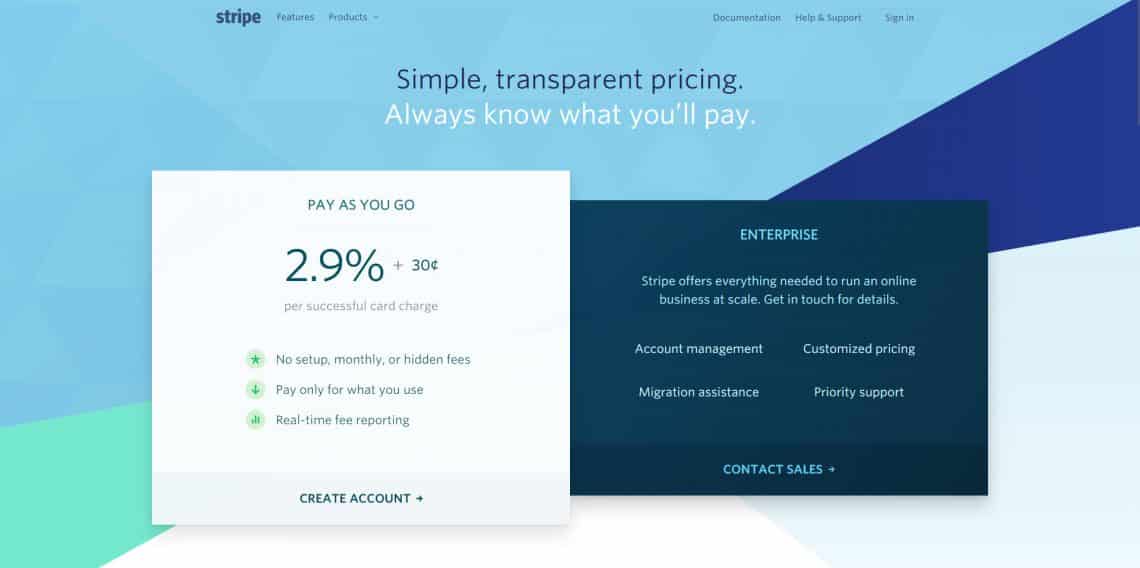
You don’t need to pay any monthly fees or any hidden fees. You just need to pay 2.9% of the sales and a fixed charge of 30 cents. If you want to make refunds to your customers, then you have no refund costs too.
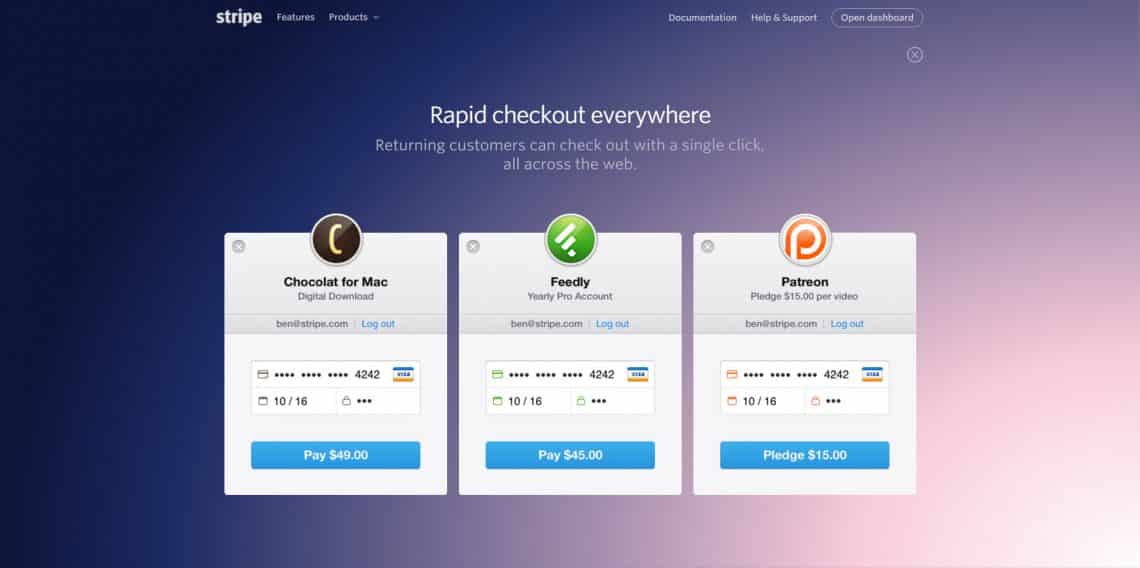
When your business starts to make more than 80,000$ a month, you can get a discounts in these charges too. For that you need to get in touch with the stripe payment gateway. So let’s see a preview of stripe checkout.
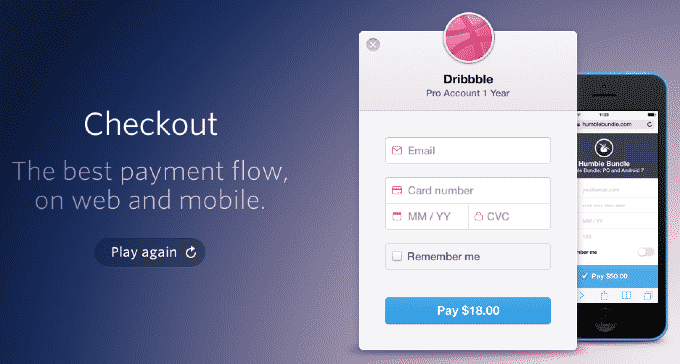
When the user enters their email and credit card details, they will be asked to enter their mobile number and they can pay right away. So, this is how the payment works using stripe payment gateway.
Unlike PayPal, which takes a visitor away from your website to get the payment done, stripe checkout is of embedded form which means your customers will not be taken away from your website, instead they will stay on your website.
But this stripe payment form will seem like a pop up or like a overlay. So they have a feel of, they are paying in your website but their credit card details and other details are securely transmitted to stripe’s payment gateway.
This checkout form is available in English, French, Spanish, Dutch and some other languages. You can accept any form of payment such as credit card, debit card or even bitcoin.
Customer can make one tap mobile payments. Stripe checkout let’s your customer save their details which they enter their email address and a phone number, so they can pay with a single tap. The payment will be secured by One Time Password sent via SMS.

You can use the official Stripe plugin which woo-themes provides. When you enter Woo Themes website, you can find stripe under woo-commerce extensions which you can download for 0.00$, which means it’s free. You can use it for as many websites as you like. You just need to create an account in woo-themes, then add this plugin to cart, download it and add it to your website.
If you haven’t created an account, create one now. If you already have one, then click “click here to login“. Enter your username and password, then login and click purchase.
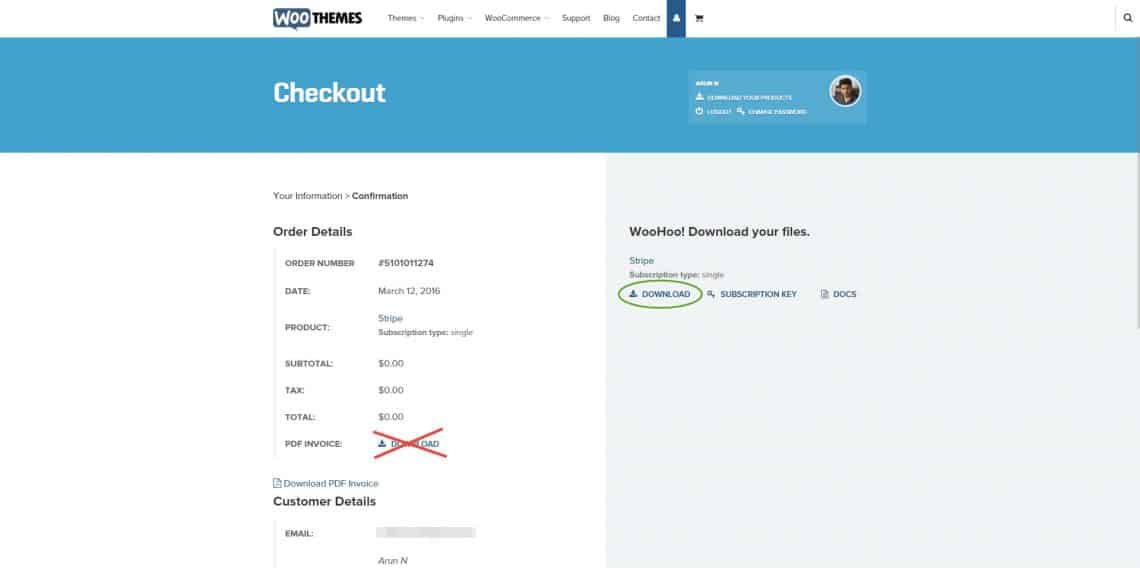
You can download the plugin by clicking the download button on the right section of the page. If you click the download button the left section, you will download only the PDF invoice. So make sure you click this button.
How to install Stripe Payment Gateway Plugin?
Now we are going to install the plugin which we have downloaded above i.e. Stripe payment gateway.
- Go to Plugins
- Select add new
- Click upload plugin
- Click choose file
- Browse to the downloaded location of the stripe payment gateway plugin
- Choose it and click open
- Click install now button
- Once installed, click activate plugin.
To update this plugin automatically, you need to install woo-themes helper plugin. Click on that link, to download woo-themes helper. Upload that plugin and activate it.
This woo-themes updater or woo-themes helper, will not only update the plugins which you have downloaded from woo-themes.It will also update all the themes that you have downloaded from woo-themes.
Once you have activated this woo-themes helper plugin, go to dashboard and select woo-themes helper. To automatically update each product, you need to insert the licence key of this product.
To get the licence key of woo-commerce stripe payment gateway, go to the check out page and click for subscription key. When you click this subscription key, it will take you to My subscription tab of your profile where you can find the key for all the products that you have bought from woo-themes, which you can copy and paste in woo-themes helper. Once you have pasted the licence key, click activate product or activate products.
You will get the licence expiry date, which will renew automatically, which you can see in auto renew section of ‘My subscription’ tab in woo-themes.
Now let’s see where you can find this stripe payment gateway in your e-commerce back-end.
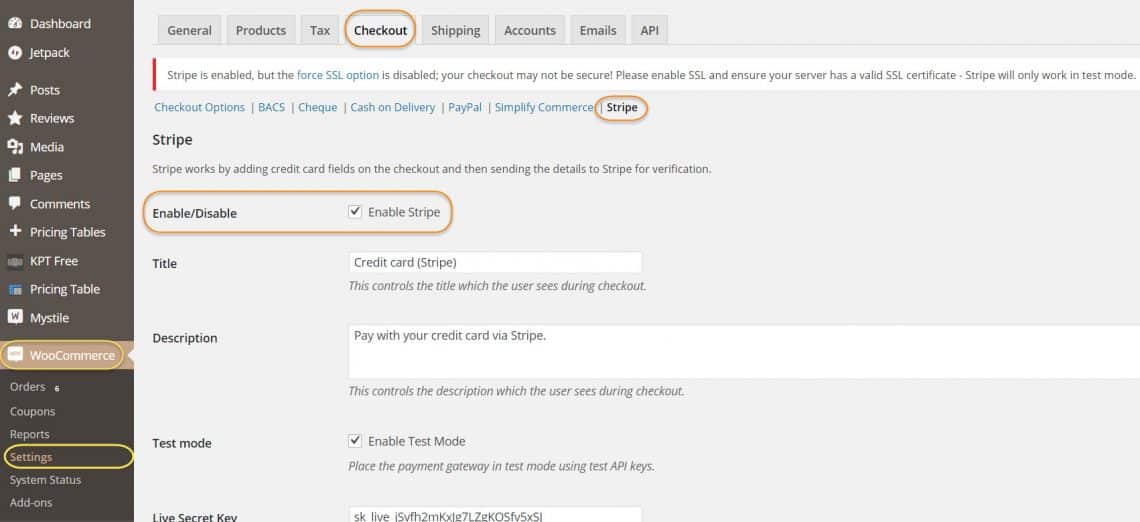
Go to woo-commerce in the side panel and select settings, then come to check out tab, where you can find stripe payment gateway.
To enable stripe you need to check ‘Enable Stripe‘ check box.
But not only that you need to configure several other fields to make this stripe payment gateway works perfect, which you are going to learn below.
How to enable Stripe Gateway in Woo-Commerce Settings?
To enable stripe payment gateway, you need a secret key and a publishable key, which you can get from stripe website and for that you need to create an account in stripe.
After that come to woocommerce -> settings -> checkout -> Stripe.
Then click enable stripe and give a title and description which your users or customers will see when they make their payment using stripe payment gateway.
We are going to make test transactions, before implementing it in your live website. So keep the test mode enabled and for the test mode to work, we need test secret key and test publishable key, which you can get from Stripe website.
Now sign in into Stripe with the account you have created.
Stripe will display you a welcome message. You can see the guides one by one, which stripe provides you to get you started or you can straight away go to dashboard.
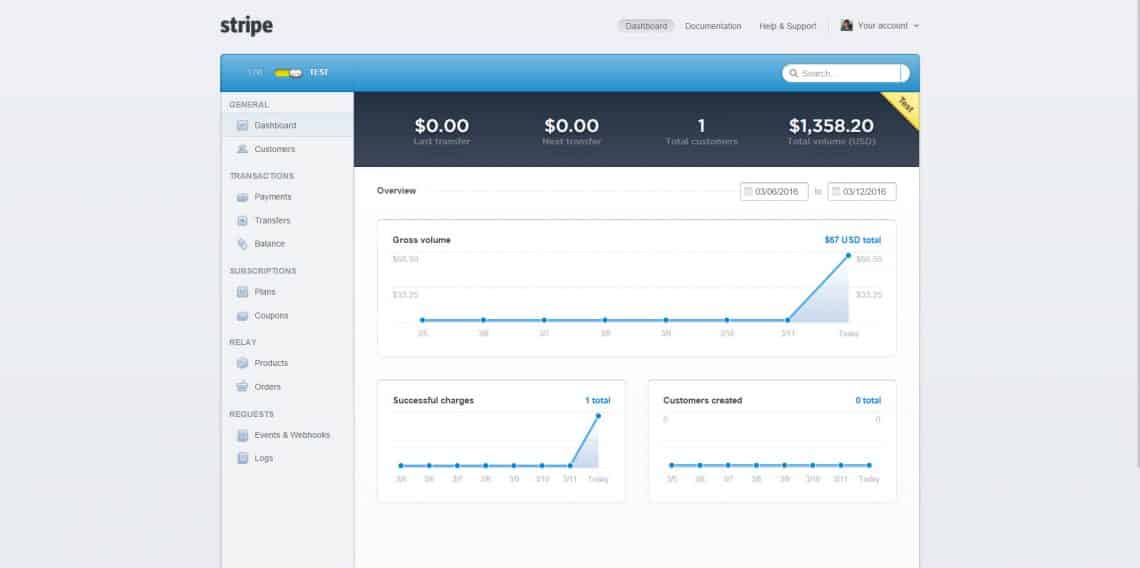
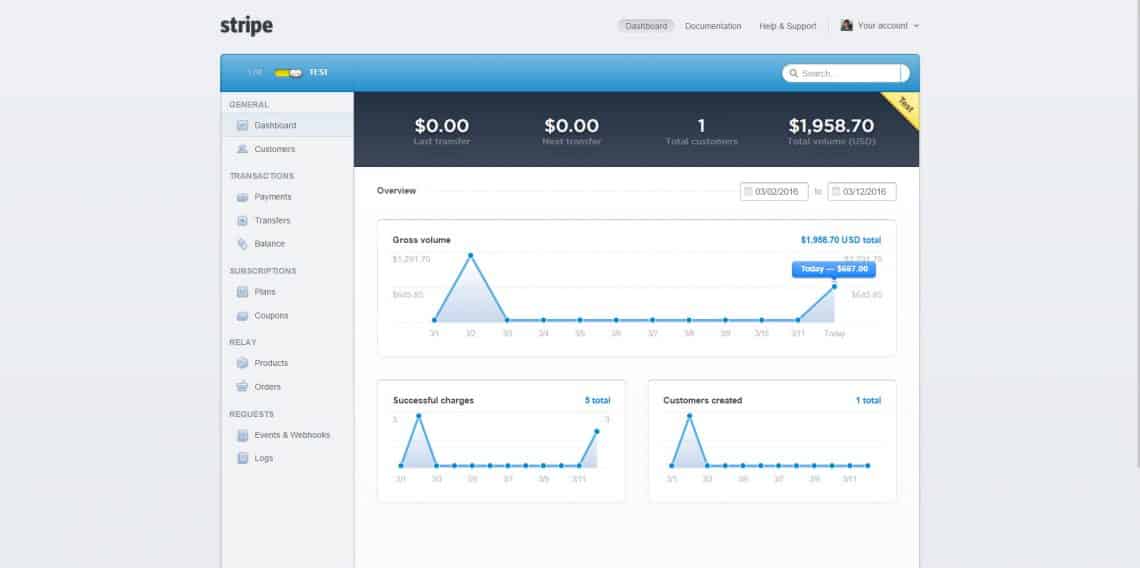
This is the dashboard, where you can see the gross volume of sales, customers created, successful charges etc.
By default, your stripe account will be in test mode. To verify that the test symbol or logo will be displayed in the top right corner.
Now you need to take the test secret key and test publishable key right?
To get those keys you need to go to API Keys.
You will be taken to the API keys page, where you can get the test, live secret key and publishable key.
You need to copy and paste all of these 4 keys into your woocommerce stripe gateway settings.
Capture charge immediately
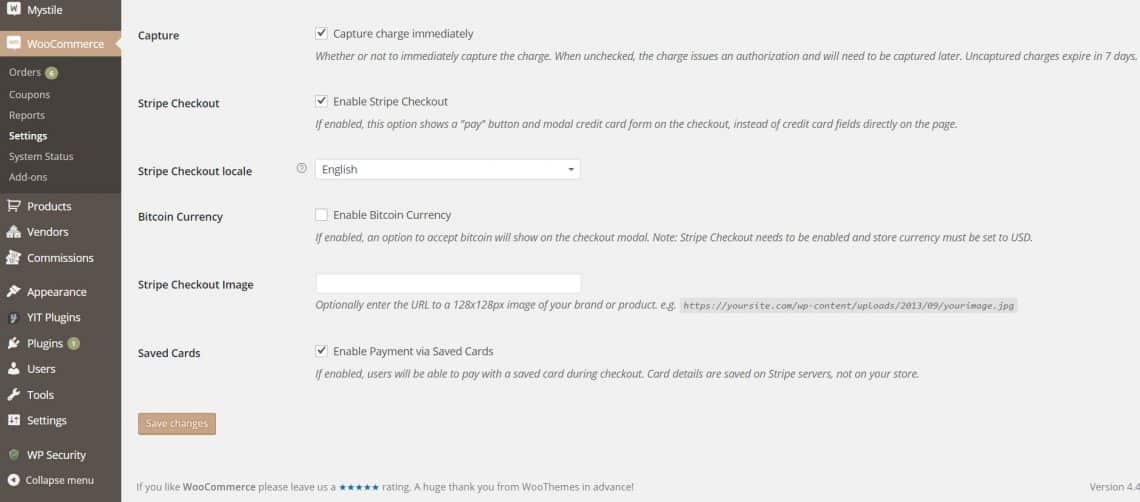
This check box says whether or not to immediately capture a charge or price. If you uncheck this check box then the charge issues an authorization and it will need to be captured later. The charges which are not captured will expire in 7 days.
Let’s deal with this stripe checkout option later.
Come to bitcoin currency. If you want to accept payments via bitcoin currency then you can enable it. If you are not aware of bitcoin, then leave this check box disabled.
Stripe checkout image
In the checkout form, if you want to display the logo of your website, then you can optionally paste the URL of the logo image here.
Last option is saved cards
If you enable this check box, users will be able to pay with a saved Credit or debit card during checkout.
Don’t worry! Those card details, which are saved will be stored on stripe’s server and not on yours. So you don’t need to worry about those security concerns.
Now click save changes.
Test Transaction 1
This is how stripe dashboard appears after the test transactions are done. There are 3 graphs here
- Top graph represents the amount of sales
- Left graph represents the number of customers created
- Right graph represents the successful charges
You can see the customer details by going into customers tab under this general section. If you click on Payments, then the details of the transactions will be displayed to you.
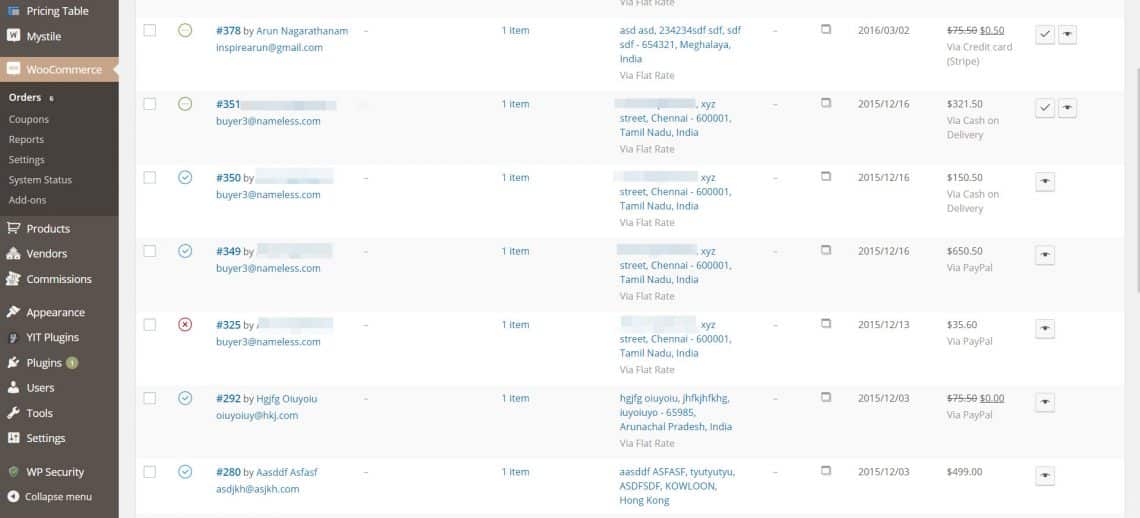
The first order, that is #378 is the test transaction I have made already and you can see that the payment is made via credit card and the gateway is stripe.

So let’s make another test transaction in front of you. I’m going to buy Apple iPhone 6S plus. Let me choose Silver color and 16GB storage space. The final amount comes to $599.
Apple iPhone 6S plus Silver is added to the cart.
After 10% discount coupon and adding the flat rate of $1.5, the price comes to $600.50
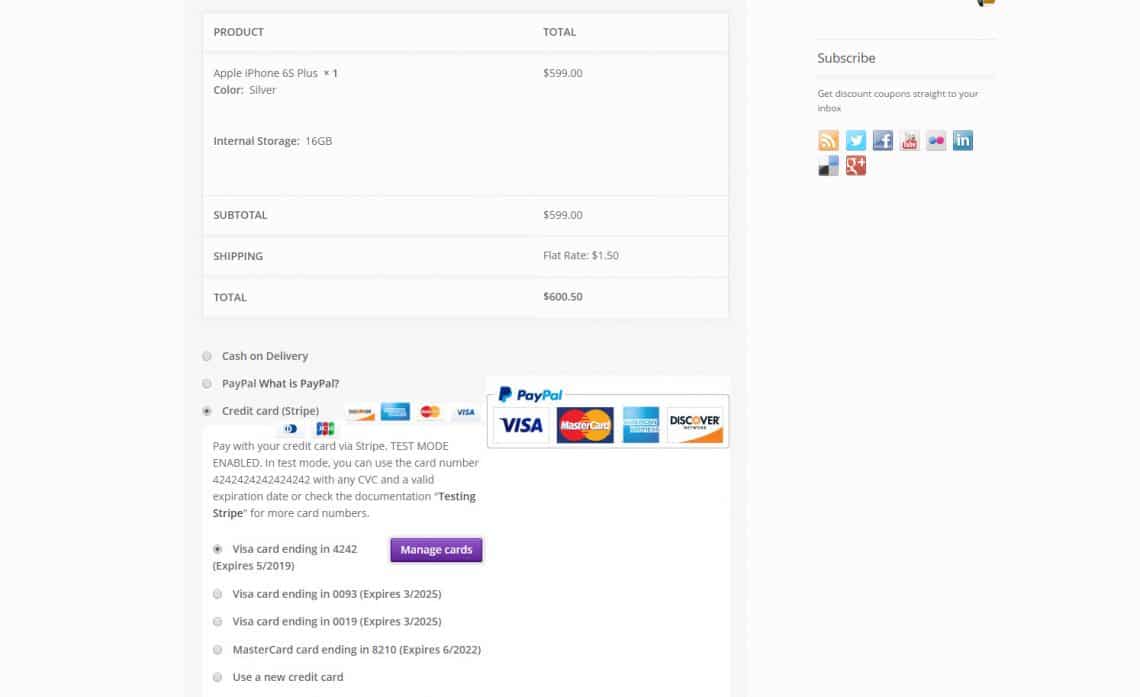
I have already paid using this credit card. So after choosing credit card stripe, I can use the previously saved card. But let’s use a new credit card. This is a test transaction and I have enabled test mode in stripe payment gateway.
See I have enabled the test mode. If I disable this test mode, my stripe payment gateway will now work.
Do you know why?
Because I haven’t installed SSL certificate in this server.
To use stripe payment gateway in your live website, the steps you should do are,
- Disable this test mode check box
- Go to checkout options
- Enable force secure checkout
To enable this check box you need an SSL certificate, which you can ask your hosting provider to install it for you.

Let’s continue with the test transaction. This is a testing instruction document from stripe, where there are multiple number of credit cards given. Only these credit cards will work on test transactions. You cannot enter a random credit card and make payments. There are several credit cards such as VISA, Master, American Express, Discover etc.
Also there are multiple other credit cards which you can use to test some specific scenarios such as to test a declined card or incorrect CVC code or an expired card etc.
Now let’s use Master Card Debit card this time. In this test document, only the number of Debit or credit card will be provided. You need to use a random expiry date, better a valid one. i.e. a date next to current date but you can use a random CVC code.
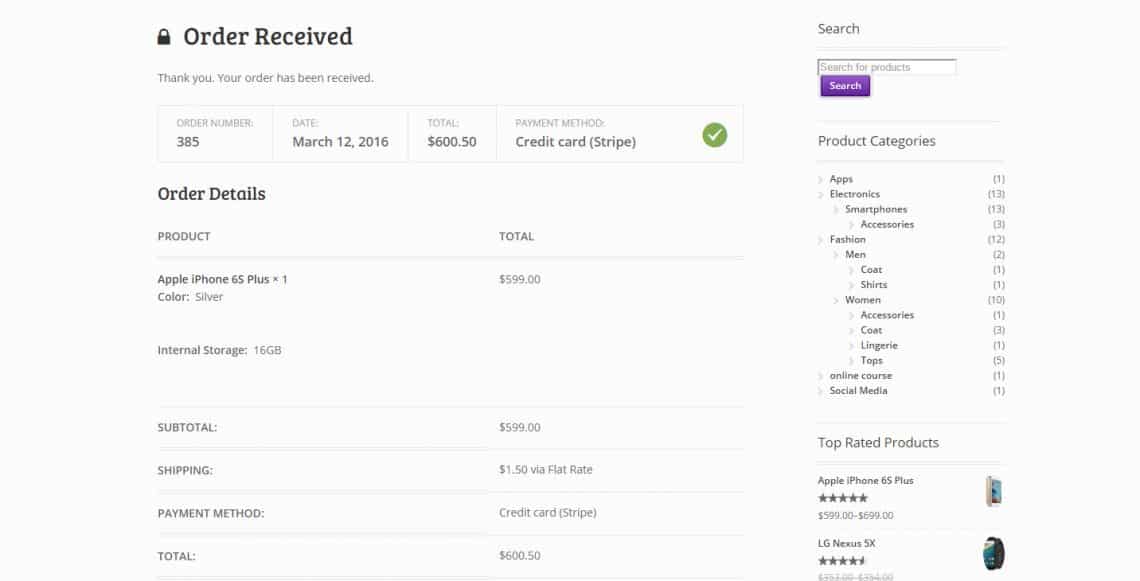
The order is successfully placed and the payment method is credit card stripe. Though I have used Master card Debit card, the information that is shown under payment method is Credit card stripe, which is as per the title and description you gave in Stripe payment gateway plugin setup.
So let’s go to our stripe dashboard and check whether we have received the payment. We have received our payment.
You can see it here. This is the transaction that I have done now. You can see that the customers created still stands only 1, because all these purchases I have made using the same customer name.
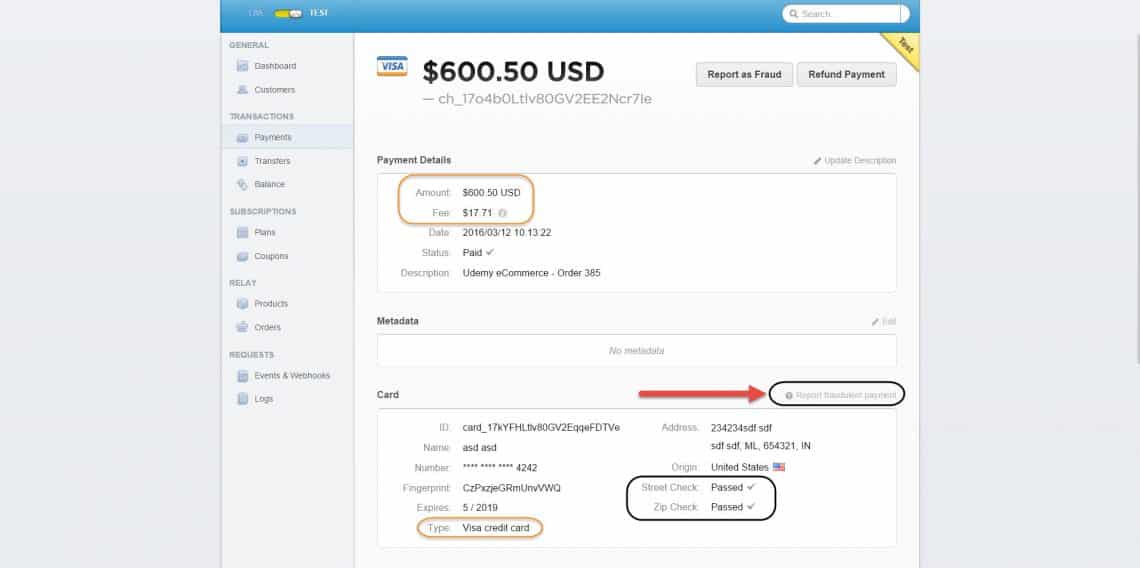
Let’s go to payments. You can see that the VISA card icon is displayed here. For $600, you get a fees of $17.21. This is stripe processing fee. For new E-commerce store owners this stands good, because you don’t need to pay any monthly upfront fees. You just have to pay some part of your sale revenue, only when the sale occurs.
Also you can see that the CVC check, Street check, zip code check are all passed by this Master card Debit card. One thing you can confirm here is that the payment method which is displayed under woocommerce orders is shown as credit card stripe. But under the payment details of stripe dashboard, you can see the type of MasterCard Debit card. So you can confirm what is the mode of payment in stripe dashboard.
For any reason, if you believe this as fraudulent payment, then you can report this as a fraudulent payment by clicking on this link to stripe.
Now we’re going to make another test transaction with incorrect CVC code and also by enabling the pop up or embed mode of stripe payment gateway.
Test Transaction 2
We are going to enable the embed mode of stripe payment gateway and, we are going to use a credit card, whose CVC code is going to be declined.

- So first go to woocommerce -> settings.
- Then come to checkout tab
- Choose stripe payment gateway
- Come down, enable stripe checkout
- Click save changes
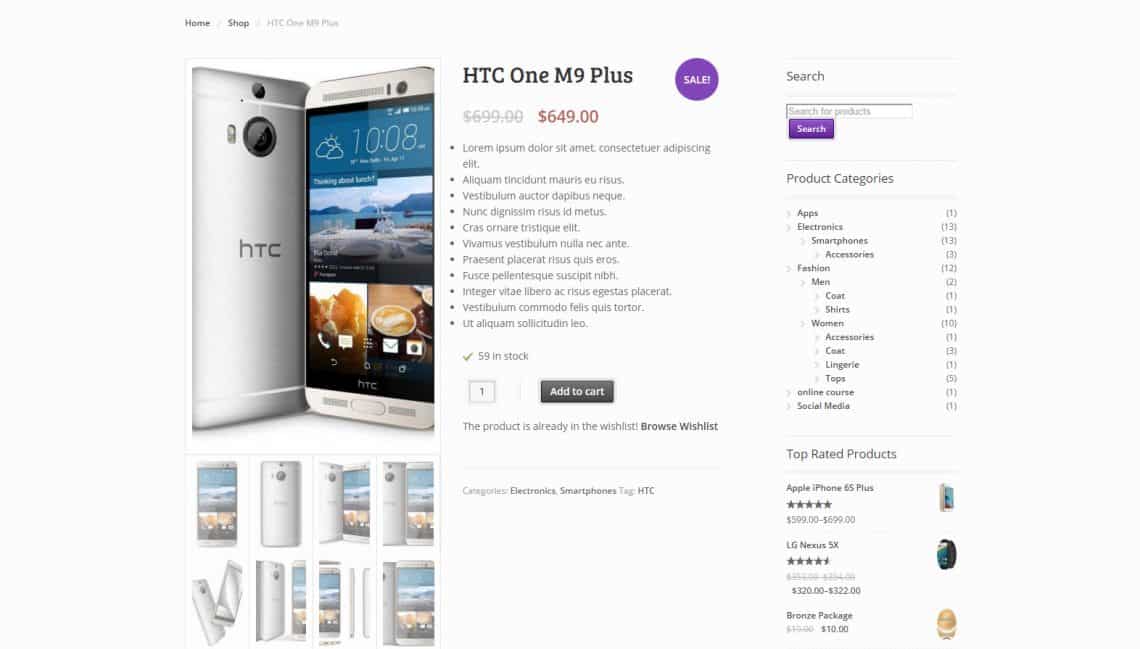
I have opened HTC One M9 Plus Smartphone. We are going to add this Smartphone to cart.

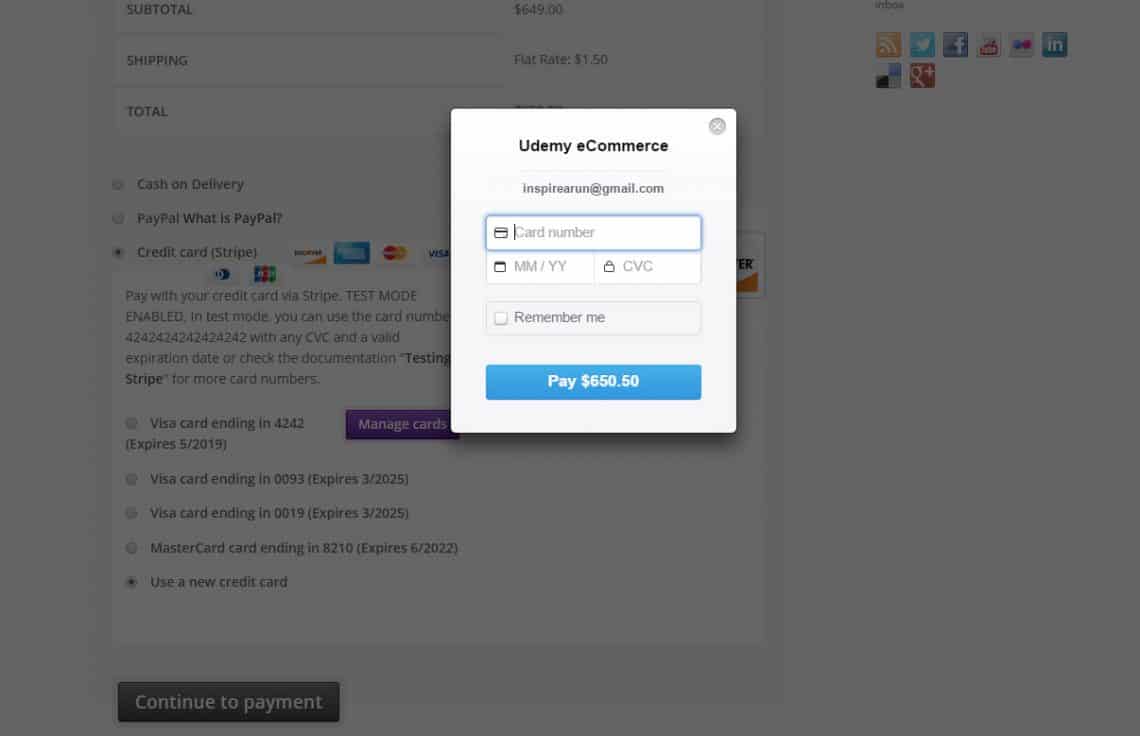
Let me click use a new credit card instead of saved previous credit cards, because we are going to use a credit card whose CVC code is going to be declined. Click continue to payment.
Do you remember that we have enabled stripe checkout?
If that check box is enabled then a pop up will appear instead of you directly entering the credit card details in the form that appears directly on the page.
To have the credit card number let’s move to the testing document from stripe and let’s choose this number.
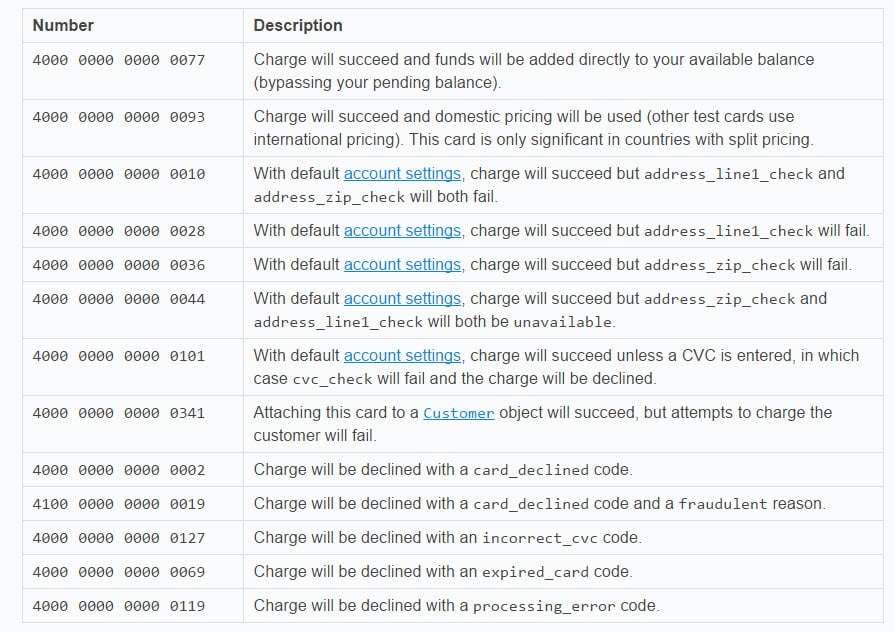
Because this corresponds to incorrect CVC code. this means whatever CVC code that you enter for this test credit card, then you will get an incorrect CVC code error. Click pay.

See this displays incorrect CVC code, because the red outline is around a cvc code box.
If you wish, you may test with other card numbers too, to test address line check, address zip check, declined card, fraudulent card etc. You can even test with American Express or Discover cards too.
What we have done till now?
- Created the stripe account first
- Installed the plugin and configured it
- Made 2 test transactions to test various credit cards that are given in stripe testing document
As a last note let me remember you, if you want to accept bitcoin payments then you need to enable bitcoin currency and you can insert a logo or image on stripe checkout page or the pop-up.
Once you go live, you need to disable this test mode and you can leave these test secret key and test publishable key as it is. But also remember to enable force SSL option under the default WooCommerce -> Settings -> Checkout tab, which will enable HTTPS on the checkout pages. For this you need to install an SSL certificate.
How to make a refund of the order received through stripe payment gateway?
I have already made a refund for 1 order that I have made in the previous test transactions. But still the total volume of sale didn’t change even after the refund. So you cannot get any details about the refund in stripe dashboard.
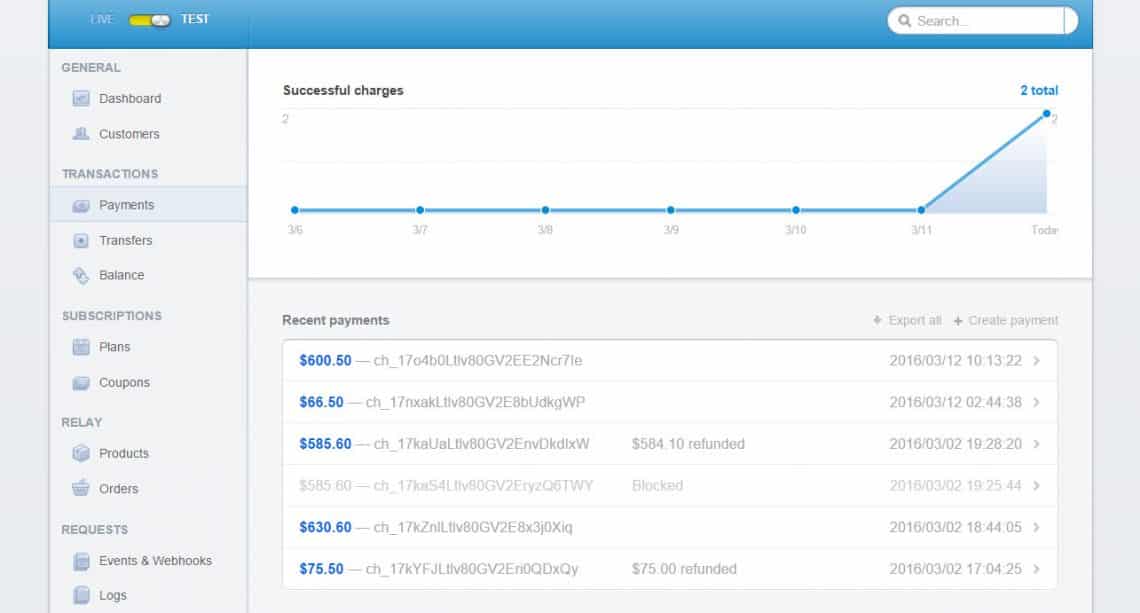
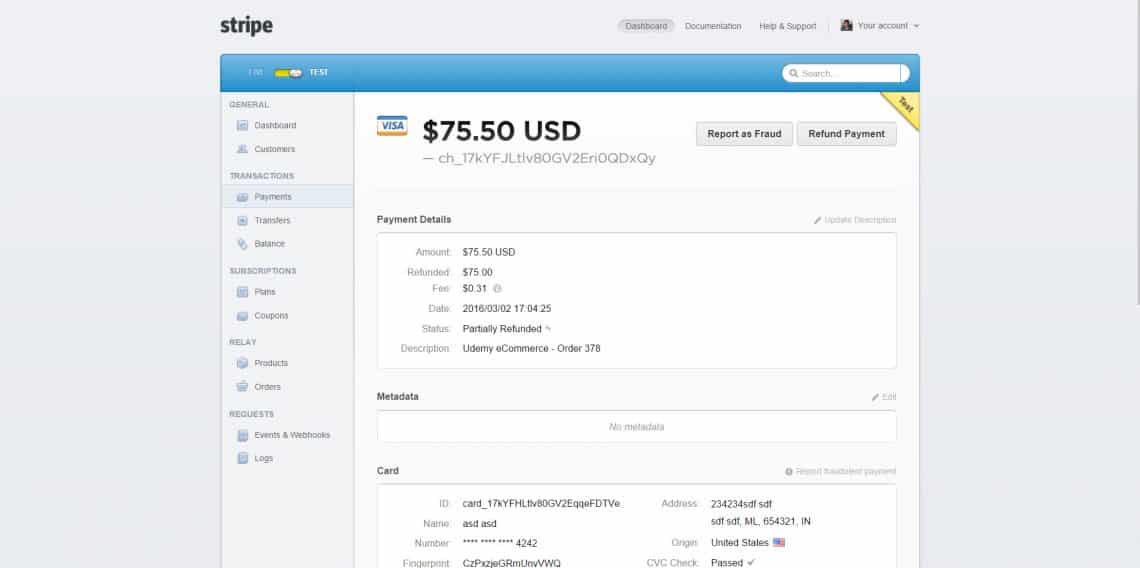
Instead, you need to go to the payments under transaction. Here you can see the status of all the transactions that are done in stripe payment gateway.
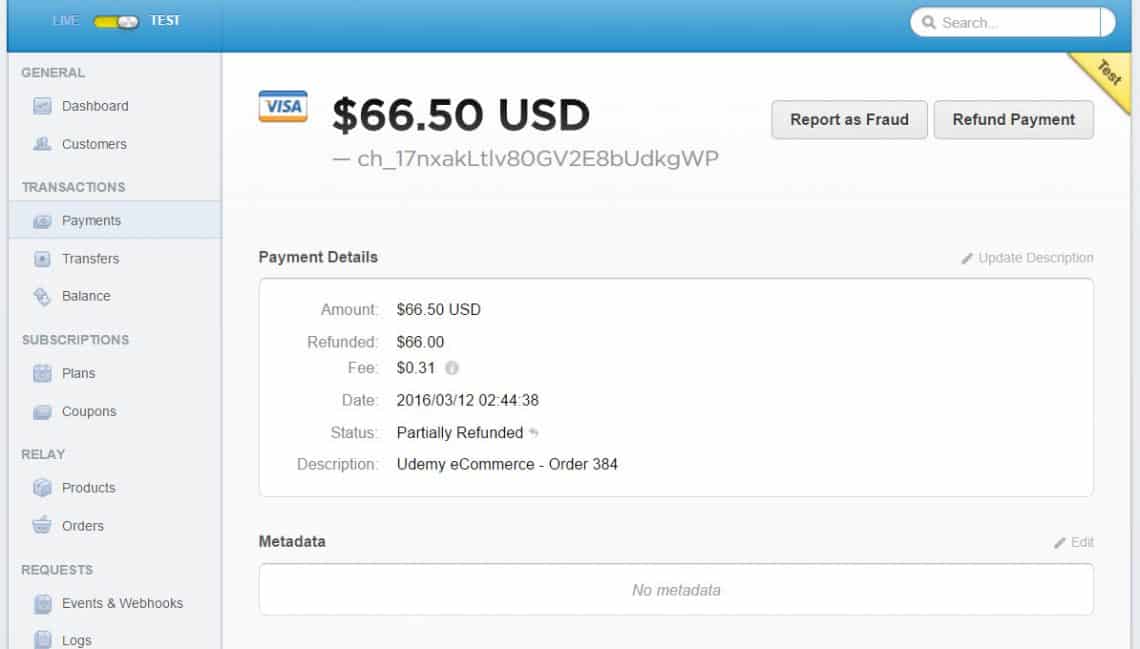
Let’s see the details, the amount paid by the customer is 66.50$, because I have partially refunded $66.00, which is the manual amount I have entered. But the fees for refund comes to 0.31$ only, which is the fixed fees that you should pay for every transaction for stripe payment gateway and there are no refund fees as said before.
Since I have refunded partially, the status is mentioned as partially refunded and the description is generated automatically as order 384.
To make you clear of how this refund works, let me make another refund of a prior transaction, we made in test transaction 1.

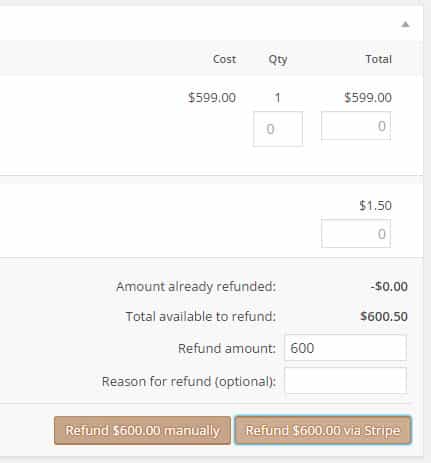
These 5 transactions are done using stripe payment gateway. So let’s refund this #385 order made for $600.5
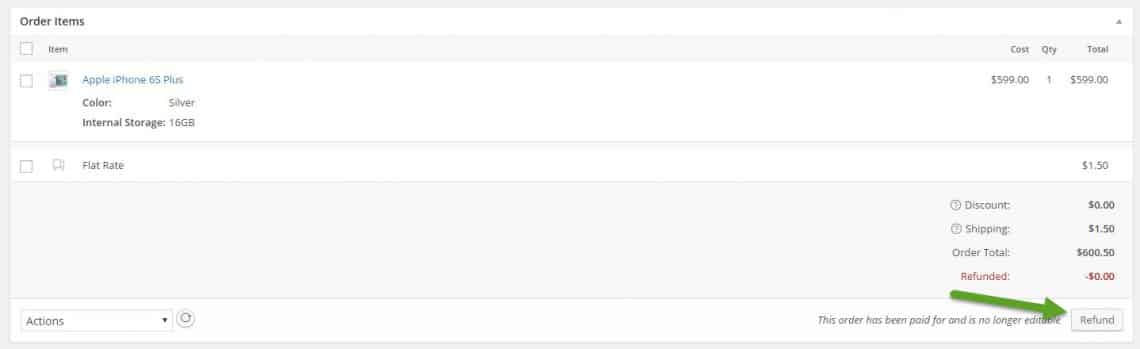
To refund an order click on the order number, then you will get 2 options when you click the refund button.
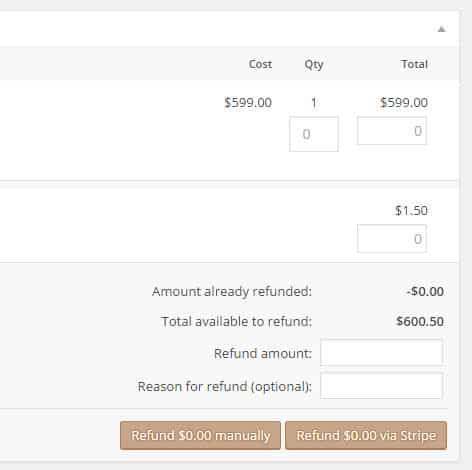
You can enter the refund amount and the reason for refund, which is optional. But the refund amount is compulsory field, where you can enter the refund amount subtracting the fee charged by stripe or you can entirely refund the amount charged from customer.
Let me refund 600$. Now you have 2 options i.e. refund manually or refund via stripe. If you click refund 600$ manually, then you need to issue a refund through your own payment gateway after clicking this. There will be no change in stripe dashboard or stripe payments, because if you click $600 refund via stripe, then the refund will be made automatically. You don’t need to go to stripe payments or you don’t need to make the refund by your own. Everything is done automatically. That’s the benefit of this official stripe plugin from woothemes.
So let me click refund via stripe. Another confirmation will be asked. Now the refund has been made. So let’s check it via payments.

You can see ‘$600 refunded‘ appears here and the status is partially refunded, where the fee comes to $0.31. So in this tutorial, you have learnt how to make automatic refunds via stripe payment gateway in your woocommerce orders dashboard itself.
So it’s pretty convenient right!
With this you have completed the complete tutorial on How to add stripe payment gateway to your WordPress website.
How to Turn $30,000 into $128,000: https://lil.ink/5000perday83582